Posts

Showing posts from February, 2024

Liberty Mata Project 2: Laser Cutter

Image
 Process My original idea for this project was to create a playing card box, but the dimensions of my box ended up being small, so it turned into more of a jewelry box midway through the process. I designed the box in Fusion, which I battled with many times due to my attempts to perfect the design. I found a picture online to engrave something simple and hidden into the inside bottom of the box. Then, I put my design into the laser cutter program and let the machine do its process. After my pieces were cut out and engraved, I used a bit of wood glue to secure them together.  First draft of my box Design during printing process Meyer helping me with the laser cutter! Result I ran into a bit of issue getting the right size of wood for my design, so I had to go back into my Fusion and correct a few of the measurements. After I fixed the measurement inconsistencies, though, I was able to recut my box, so the pieces fit together perfectly. I also feel like the engravement could've ...

Luka Marko Pravica Project 2 laser cutter

Image
 Process: The process began by modeling the stackable pencil box in fusion 360 I found this considerably harder than last time as I made many mistakes and had to repeat several times. I then began to think of my own design. For my own design. I had to make only a few changes to my fusion 360 design, namely I made the length of the sides all equal,I added  an area for the reaction to take, a hole to dump reactants, and an entry point for a magnetic stir rod and thermometer. Finally I uploaded my drawings and began using the laser cutter. I messed up this process the first time, because my fusion 360 model was incorrect. I remolded my fusion 360 model and tried again. The second time work successfully I removed my pieces from the laser cutter and fit them together to ensure they worked. After this I Placed my top piece back into the laser cutter to engrave a design on it. I finally, I glued the pieces together    Result: Im overall fairly happy with the result. I reall...

Nate Goodwin Project 2: Laser Cutting

Image
Process: To get a hand of the process, we originally created a pencil box in Fusion 360 to learn how to build schematics. After learning this, we tried making our own boxes. My box had the original intent to have a hinge lid, however I ran out of time and was not able to finish the lid of the box. After creating this, I created .DXF versions of the side i wanted to use. I then sent these to the printer and cut out my pieces. After this, I took the piece and engraved my piece using the laser as well.  Finally, I glued my pieces together using wood glue, and got the finished product. Results I'm relatively happy with the results. My measurements were accurate which was really nice, and everything slot in really nicely. I ended up having some useless hinges as an end product, but they make it look unique even if there's no lid. The eye looks awesome as well, even if it's a bit off-center. Reflection There are a few flaws with my box. I originally intended for there to be a lid...

Scott Wald Project 2: Laser cutter

Image
 Process At the start I completed the pencil box tutorial from Ryan, and after some thought I came up with a few tweaks and features I wanted to add. I started by making the box a little longer I think and making it a bit taller. This was a simple use of the dimension feature in Fusion 360. Then I added a sketch for the middle divider by creating points on the short side so that I could copy features of the short side I liked and omit features that wouldn't work. After this I created a toothy design on the sides that I saw on laser cut boxes around the makerspace. After the fusion 360 designs were complete I exported the files to the rayjet and had them cut. Then I took one side piece and used the laser printer to print text that I wanted on the side of the pencil box. Finally I used a mallet to pound pieces that fit well together and used wood glue to hold in the smaller sides. Result I am pretty glad with how it turned out and I think I will definitely make more things like this ...

Project 1: building with hand tools.

Image
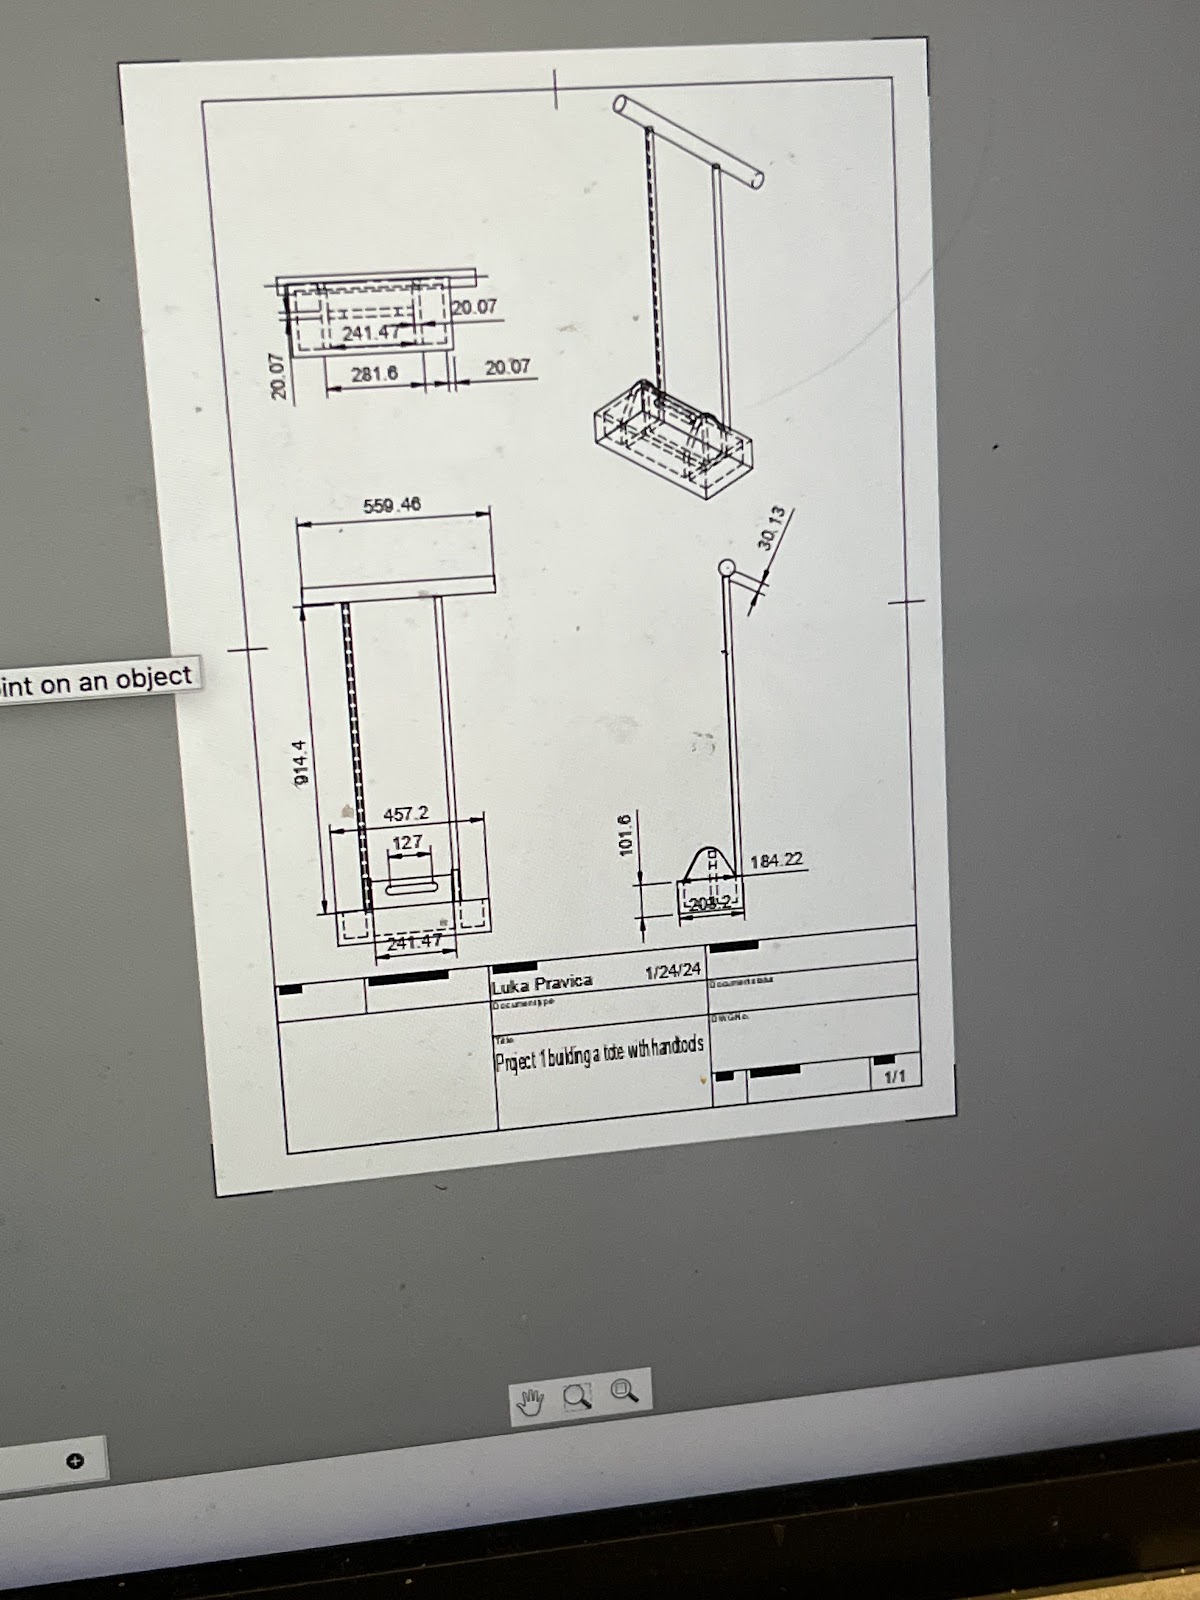
 Process. The process began with modeling my idea in the fusion 360 software. I had never modeled a build design, however I was apart of the trinity animation club last semester and got experience with similar modeling software like blender. I overall found the process of modeling to be intuitive and fun, though when I deviated from the original protocol and attempted to add my own  design tweaks I defiantly  ran into some complications. Next I traced pieces I would need to cut for my project on an 8 foot board of wood, to do this I frequently referenced my schematics drawing and found the dimensions for my constituent parts. I then broke the parts down into simpler shapes (squares  and rectangles) and drew them in a way that would require the least cuts possible(usually right around the edges). I also ensured to not draw my pieces directly next to each other because I was informed the miter saw was roughly .8 inches in width. Next,  I cut out my pieces. I start...

Nate Goodwin Project 1: Building With Hand Tools

Image
Process The first step in making the toolbox was to create the design in Fusion360. Fusion360 helps to model digitally what the finished toolbox would look like, with specific measurements for pieces listed as well.  Model of the Toolbox Made in Fusion360 Blueprint of my toolbox After this was to sketch the pieces on a board of wood. This was then cut  using a miter saw and bandsaw into the pieces of the toolbox. A jigsaw was used for cutting out the handle. The cut pieces arranged in the shape of my toolbox I then sanded down the pieces so they didn't splinter. After that I used a drill and screws to put the pieces together. We have a finished product! Results I'm really happy with how my tote turned out! For being one of my first woodworking pieces, It looks great! In terms of the process, I had to have some help with a few of tools, which now that I have an even greater understanding of them, I should be even better off when working on wood in the future.  Reflection T...

Liberty Mata Project 1: Building with hand tools

Image
 Process To start off the design process, I followed the provided tutorial instructions to create a basic tool tote in Fusion 360. Then, I modified the original tote design to include a round bar handle, softer edges around the top of the main tote compartment, and heart-shaped cutouts below the handlebar. Once I had my design finalized, I drew the appropriate measurements onto my wood plank and created outlines coinciding with the boards needed to construct the assets of my tote. I proceeded to use the chop saw to cut down my plank into more manageable sections and used the bandsaw to cut out my outlined pieces. I sanded all of the edges of my pieces and used a trim router to soften the top edges of the main tote compartment. I also used a drill press to create holes in two of my pieces to fit my handlebar and, on those same pieces, I used a jigsaw to cut out the heart-shaped designs. Next, I mock-constructed my tote and marked some ideas for where to add screws. I drilled small e...

Scott Wald Project 1: Building with hand tools

Image
 Process The first part of making the tool tote is to create a design in fusion360. This extremely specific software is useful in the building process because of how you can specify exact dimensions in the blue prints. After this, it is useful to sketch all of the building pieces on a piece of paper and label them all with letters. The next step is to carefully draw out the tool tote pieces on a large piece of plywood. Next, the chop saw needs to be used to cut the plywood into more digestible and workable pieces. After this the bandwidth saw needs to be used to cut out the exact pieces needed for the project. This does not solidify the design though because pieces are still free from each other, so they can be switched around based on the builder's preference. In my case, I moved two walls from holding together a smaller handle to be at either end of the tote to hold a long bar, and therefore opening more room within the tote for larger tools. This handle was made by finding a nic...