Nate Goodwin Project 4: Desktop CNC
Procedure
To start the I first learned how to upload .STL files and create the topographic cardholder with the tutorials. They helped me learn how to work with the Xcarve tools and figure out how to use the extrude tool as a carving feature.
I then moved to Adobe Illustrator to create the outline for the model I wanted to create, a charm design from Hollow Knight. I created this design then ported the file as a .SVG file to illustrator. I then extruded the main part of the body to the mark and the "grooves" to a lower amount until the file came out like this.

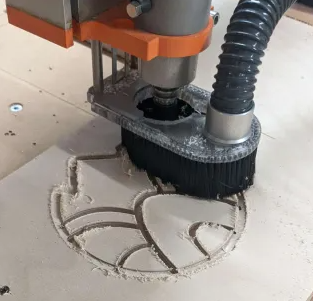
I then created pathways for the drill bits to follow and sent my design to the CNC machine. After drilling my wood down to the board, it started drilling the design immediately after.
I then sanded down my piece until it was clean.
Results
I'm happy with the results of my charm! I might paint it later to add color, but the design was very clean (albeit a bit larger than what I originally intended). The grooves are not too far down, so it still has some strength and won't shatter when dropped which I like.
Reflection
The biggest problem was creating the file in illustrator. I had trouble exporting the .SVG file due to an overlap on lines in Fusion360, and I had to completely recreate my model from scratch after bashing my head for a while. It's hard to find a good analogy to my problem, but it was something similar to the fill tool filling the entire screen in MS Paint since you missed a pixel to "close" the drawing. It ended up working out in the end, but If you look at the image, I had many overlapping lines in illustrator, which helped to "close" the lines.
I also had a mishap when, and had to scale up my design by about 1.75 of what I originally intended in order for the drill bits to fit.


.webp)
.HEIC)

Comments
Post a Comment